Quantcast
Channel: Thoughts on software development
Viewing all 79 articles
Browse latest View live

Access resources in Java archives with Virtual File System (cross-application sever solution)

$
0
0
During my work on a custom JSF library I was looking for a way how to read the metadata from composite components in order to create a nice self-documented library. Based on this great article from Ed Burns I implemented a nice documentation framework which extracts all metadata from the VDL. Main idea:
FacesContext fc = FacesContext.getCurrentInstance();
ViewDeclarationLanguage vdl = fc.getApplication().getViewHandler().getViewDeclarationLanguage(fc, "/views/home.xhtml");
Resource ccResource = fc.getApplication().getResourceHandler().createResource(resourceName, libraryName);
BeanInfo metadata = vdl.getComponentMetadata(context, ccResource);
PropertyDescriptor attributes[] = metadata.getPropertyDescriptors();
// read metadata for cc:attributes, cc:clientBehavior, cc:valueHolder, cc:actionSource, cc:facet
...
The createResource method above expects the resource name and library name to access the metadata of a composite component. The library name is known. Assume the composite components are placed in a JAR file under the folder /META-INF/resources/com/foo That means, the library name is com/foo. The problem is to get names of all resources below the com/foo. Resources are XHTML files as composite components. For instance, for this structure
/META-INF/resources/com/foo/mycomponent1.xhtml
/META-INF/resources/com/foo/mycomponent2.xhtml
the resource names would be mycomponent1.xhtml and mycomponent1.xhtml. Without file extensions, they are the same as tag names of composite components. Is there a simple and reliable way to read these names from a WAR archive? Yes, sure, there is a simple method to read resources located in one Java archive from another Java archive. JBoss has Virtual File System (VFS). A good documentation can be found here. Please don't confuse it with Apache Commons VFS. These are different things with perhaps the same goal. In JBoss 6 / 7 application servers, if we read JAR files from the classpath, URLs start with vfs (meaning virtual file system) and not with file as usually. So that JBoss VFS is very handy here because it is exactly for vfs handling. The implemented approach is also working with all other application servers. I tested successful:
  • JBoss 6 / 7
  • Jetty 8
  • GlassFish 3
  • Tomcat 7
  • WebLogic 12
The next method shows the approach. To get an URL for the interested JAR file, we need to know any Java class in this JAR file. This can be a marker interface or any other interface, abstract class as well. Obtained Class object can be passed into the method along with the library name.
public void extractMetadata(Class clazz, String libraryName) throws IOException, URISyntaxException {
VirtualFile virtualFile;
Closeable handle = null;
URL url = clazz.getProtectionDomain().getCodeSource().getLocation();
String protocol = url.getProtocol();

if ("vfs".equals(protocol)) {
URLConnection conn = url.openConnection();
virtualFile = (VirtualFile) conn.getContent();
} else if ("file".equals(protocol)) {
virtualFile = VFS.getChild(url.toURI());

File archiveFile = virtualFile.getPhysicalFile();
TempFileProvider provider = TempFileProvider.create("tmp", Executors.newScheduledThreadPool(2));
handle = VFS.mountZip(archiveFile, virtualFile, provider);
} else {
throw new UnsupportedOperationException("Protocol " + protocol + " is not supported");
}

List<VirtualFile> files = virtualFile.getChild("/META-INF/resources/" + libraryName).getChildren();
List<String> resourceNames = new ArrayList<String>(files.size());
for (VirtualFile ccFile : files) {
resourceNames.add(ccFile.getName());
}

if (handle != null) {
handle.close();
}

FacesContext fc = FacesContext.getCurrentInstance();
ViewDeclarationLanguage vdl = fc.getApplication().getViewHandler().getViewDeclarationLanguage(fc,
"/views/home.xhtml");

for (String resourceName : resourceNames) {
Resource ccResource = fc.getApplication().getResourceHandler().createResource(resourceName, libraryName);
BeanInfo metadata = vdl.getComponentMetadata(fc, ccResource);

// extract metadata
...
}
}
As I said, supporting of two URL protocols, vfs and file, was enough for me to get it working on all modern app. servers. The main goal of this method is collecting VirtualFile instances below a certain folder. VirtualFile allows to get other infos such as size, name, path, whether the object is a file or directory, etc. It allows to get children und provides many other traversal operations. For the file protocol, we have to mount the archive file in the Virtual File System (like in UNIX). Once mounted, the archive structure is accessible like a normal file system. The call virtualFile.getChild("/META-INF/resources/" + libraryName).getChildren() returns all children (VirtualFile instances) below our /META-INF/resources/com/foo/. We iterate through and collect resource (file) names.

PrimeFaces Cookbook published today

$
0
0
PrimeFaces Cookbook was published today. The book writing was a piece of a hard work and I'm happy to finish it.


I would like to thanks all persons who were involved in the entire writing / reviewing process. Especially the people from the Packt Publishing, the PrimeFaces project lead Çağatay Çivici, my co-writer Mert Çalışkan, our reviewer  Andy Bailey and my family. Çağatay wrote a nice post today. Also Andy wrote a post today. I can not add something more :-)

How to prevent tab changing in PrimeFaces TabView when validation failed

$
0
0
Trying various approaches to the question above (with p:ajax event="tabChange" and so on), I came up with a clean and well working solution. The code below turns on the PrimeFaces TabView into a "wizard mode". That means, the user stays on the same tab when he / she is trying to switch tabs and has validation errors within the current tab. The main idea is to use p:remoteCommand for a deferred decision about tab switching. If no validation errors were present, the switching occurs by the TabView widget's method select.

XHTML
<p:tabView ... widgetVar="tv_widget" styleClass="tv_selector">
...
</p:tabView>

<p:remoteCommand name="tv_remoteCommand" process="@(.tv_selector)" update="@(.tv_selector)" global="false"
oncomplete="handleTabChangeTV(xhr, status, args, tv_widget)"/>

<h:panelGroup id="tv_script" styleClass="tv_selector">
<script type="text/javascript">
$(function(){
bindOnClickTV(tv_remoteCommand, tv_widget);
});
</script>
</h:panelGroup>
JavaScript
function bindOnClickTV(rc, widget) {
// unbind PrimeFaces click handler and bind our own
widget.jq.find('.ui-tabs-nav > li').unbind('click.tabview').
off('click.custom-tabview').on('click.custom-tabview', function (e) {
var element = $(this);

if ($(e.target).is(':not(.ui-icon-close)')) {
var index = element.index();

if (!element.hasClass('ui-state-disabled') && index != widget.cfg.selected) {
// buffer clicked tab
widget.clickedTab = element.index();

// call remote command
rc();
}
}

e.preventDefault();
});
}

function handleTabChangeTV(xhr, status, args, widget) {
if (!args.validationFailed) {
widget.select(widget.clickedTab);
}
}

Eager CDI beans

$
0
0
Everybody knows eager managed beans in JSF 2. @ManagedBean has an eager attribute. If eager="true" and the scope is application, then this bean must be created when the application starts and not during the first reference to the bean. This is a nice feature when you want to load application scoped data (e.g. some select items for menus) during application startup in order to increase the performance at runtime.
@ManagedBean(eager=true)
@ApplicationScoped
public class GlobalBean {
...
}
@ManagedBean annotation will be deprecated with JSF 2.2. It is highly recommended to use CDI (context dependency injection) beans in JEE environment. But what is the equivalent to the eager managed beans in CDI? Well, CDI is flexible, you can write portable CDI extensions. I asked Thomas Andraschko how to do this. Thomas is a CDI expert, co-owner of PrimeFaces Extensions and the committer in OpenWebBeans (OWB) project. His tip was to implement such extension as follows
@Qualifier
@Retention(RetentionPolicy.RUNTIME)
@Target({TYPE})
public @interface Eager
{
}

package mydomain.mypackage;

import java.util.ArrayList;
import java.util.List;
import javax.enterprise.context.ApplicationScoped;
import javax.enterprise.event.Observes;
import javax.enterprise.inject.spi.AfterDeploymentValidation;
import javax.enterprise.inject.spi.Bean;
import javax.enterprise.inject.spi.BeanManager;
import javax.enterprise.inject.spi.Extension;
import javax.enterprise.inject.spi.ProcessBean;

public class EagerExtension implements Extension {
private List<Bean<?>> eagerBeansList = new ArrayList<Bean<?>>();

public <T> void collect(@Observes ProcessBean<T> event) {
if (event.getAnnotated().isAnnotationPresent(Eager.class)
&& event.getAnnotated().isAnnotationPresent(ApplicationScoped.class)) {
eagerBeansList.add(event.getBean());
}
}

public void load(@Observes AfterDeploymentValidation event, BeanManager beanManager) {
for (Bean<?> bean : eagerBeansList) {
// note: toString() is important to instantiate the bean
beanManager.getReference(bean, bean.getBeanClass(), beanManager.createCreationalContext(bean)).toString();
}
}
}
The extensions should be registered in a file META-INF/services/javax.enterprise.inject.spi.Extension. The file has only one line with a fully qualified path to the EagerExtension class, e.g. mydomain.mypackage.EagerExtension.

Using is simple. Assume, we have an application scoped LayoutController CDI bean which is responsible for the entire layout configration. We can annotate it with @Eager and speed up the layout creation.

@ApplicationScoped
@Eager
@Named
public class LayoutController implements Serializable {
private LayoutOptions layoutOptions;

@PostConstruct
protected void initialize() {
layoutOptions = new LayoutOptions();

LayoutOptions panes = new LayoutOptions();
panes.addOption("slidable", false);
panes.addOption("spacing", 6);
layoutOptions.setPanesOptions(panes);

...
}

public LayoutOptions getLayoutOptions() {
return layoutOptions;
}
}
Have fun with CDI!

Passing complex objects in URL parameters

$
0
0
Imagine you would like to pass primitive data types, complex Java objects like java.util.Data, java.lang.List, generic classes, arrays and everything what you want via URL parameters in order to preset default values on any web page after the page was loaded. Common task? Yeah, but available solutions are mostly restricted to encoding / decoding of java.lang.String. The approach I will show doesn't have any limits on the data types. Only one limit is the limit of the URL size. URLs longer than 2083 characters may not work properly in old IE versions. Modern Firefox, Opera, and Safari can handle at least 80000 characters in URL.

Passing any type of objects via URL parameters is possible if we serialize objects to JSON and deserialize them on the server-side. An encoded JSON string has a valid format and this is a way to go! Well, but there is a problem. A serialization / deserialization to / from the JSON format works fine if the object is a non-generic type. However, if the object is of a generic type, then the Generic type information gets lost because of Java Type Erasure. What to do in this case? The solution I want to demonstrate is not restricted to JSF, but as I'm developing Java / Web front-ends, I'm rotating in this circle... So, let's start. First, we need a proper converter to receive URL parameters in JSON format and converts them back to Java. PrimeFaces Extensions provides one - JsonConverter.java. How it works? The following example shows how the JsonConverter can be applied to f:viewParam to convert a list of Strings in the JSON format to a List in Java.
<f:metadata>
<f:viewParam name="subscriptions" value="#{subscriptionController.subscriptions}">
<pe:convertJson type="java.util.List<java.lang.String>" />
</f:viewParam>
</f:metadata>

<h:selectManyCheckbox value="#{subscriptionController.subscriptions}">
<f:selectItem id="item1" itemLabel="News" itemValue="1" />
<f:selectItem id="item2" itemLabel="Sports" itemValue="2" />
<f:selectItem id="item3" itemLabel="Music" itemValue="3" />
</h:selectManyCheckbox>
The JsonConverter has one optional attribute type. We don't need to provide a data type information for primitives such as boolean or int. But generally, the type information is a necessary attribute. It specifies a data type of the value object. Any primitive type, array, non generic or generic type is supported. The type consists of fully qualified class names (except primitives). Examples:
"long[]"
"java.lang.String"
"java.util.Date"
"java.util.Collection<java.lang.Integer>"
"java.util.Map<java.lang.String, com.prime.FooPair<java.lang.Integer, java.util.Date>>"
"com.prime.FooNonGenericClass"
"com.prime.FooGenericClass<java.lang.String, java.lang.Integer>"
"com.prime.FooGenericClass<int[], com.prime.FooGenericClass<com.prime.FooNonGenericClass, java.lang.Boolean>>"
The string in the type is parsed at runtime. The code for the JsonConverter is available here (for readers who are interested in details). The JsonConverter is based on three other classes: ParameterizedTypeImpl.java, GsonConverter.java and DateTypeAdapter.java. The last one is a special adapter for dates because java.util.Date should be converted to milliseconds as long and back to the java.util.Date. So far so good. But how to prepare the values as URL parameters on the Java side? I will show an utility class which can be used for that. Read comments please, they are self-explained.
import org.apache.log4j.Logger;
import org.primefaces.extensions.converter.JsonConverter;
import java.io.UnsupportedEncodingException;
import java.net.URLEncoder;
import javax.faces.context.FacesContext;
import javax.servlet.http.HttpServletRequest;

/**
* Builder for request parameters.
*/
public class RequestParameterBuilder {

private Logger LOG = Logger.getLogger(RequestParameterBuilder.class);

private StringBuilder buffer;
private String originalUrl;
private JsonConverter jsonConverter;
private String encoding;
private boolean added;

/**
* Creates a builder instance by the current request URL.
*/
public RequestParameterBuilder() {
this(((HttpServletRequest) FacesContext.getCurrentInstance().getExternalContext().getRequest()).getRequestURL()
.toString());
}

/**
* Creates a builder instance by the given URL.
*
* @param url URL
*/
public RequestParameterBuilder(String url) {
buffer = new StringBuilder(url);
originalUrl = url;
jsonConverter = new JsonConverter();

encoding = FacesContext.getCurrentInstance().getExternalContext().getRequestCharacterEncoding();
if (encoding == null) {
encoding = "UTF-8";
}
}

/**
* Adds a request parameter to the URL without specifying a data type of the given parameter value.
* Parameter's value is converted to JSON notation when adding. Furthermore, it will be encoded
* according to the acquired encoding.
*
* @param name name of the request parameter
* @param value value of the request parameter
* @return RequestParameterBuilder updated this instance which can be reused
*/
public RequestParameterBuilder paramJson(String name, Object value) throws UnsupportedEncodingException {
return paramJson(name, value, null);
}

/**
* Adds a request parameter to the URL with specifying a data type of the given parameter value. Data type is sometimes
* required, especially for Java generic types, because type information is erased at runtime and the conversion to JSON
* will not work properly. Parameter's value is converted to JSON notation when adding. Furthermore, it will be encoded
* according to the acquired encoding.
*
* @param name name of the request parameter
* @param value value of the request parameter
* @param type data type of the value object. Any primitive type, array, non generic or generic type is supported.
* Data type is sometimes required to convert a value to a JSON representation. All data types should be
* fully qualified.
* @return RequestParameterBuilder updated this instance which can be reused
*/
public RequestParameterBuilder paramJson(String name, Object value, String type)
throws UnsupportedEncodingException {
jsonConverter.setType(type);

String jsonValue;
if (value == null) {
jsonValue = "null";
} else {
jsonValue = jsonConverter.getAsString(null, null, value);
}

if (added || originalUrl.contains("?")) {
buffer.append("&");
} else {
buffer.append("?");
}

buffer.append(name);
buffer.append("=");
buffer.append(URLEncoder.encode(jsonValue, encoding));

// set a flag that at least one request parameter was added
added = true;

return this;
}

/**
* Adds a request parameter to the URL. This is a convenient method for primitive, plain data types.
* Parameter's value will not be converted to JSON notation when adding. It will be only encoded
* according to the acquired encoding. Note: null values will not be added.
*
* @param name name of the request parameter
* @param value value of the request parameter
* @return RequestParameterBuilder updated this instance which can be reused
*/
public RequestParameterBuilder param(String name, Object value) throws UnsupportedEncodingException {
if (value == null) {
return this;
}

if (added || originalUrl.contains("?")) {
buffer.append("&");
} else {
buffer.append("?");
}

buffer.append(name);
buffer.append("=");
buffer.append(URLEncoder.encode(value.toString(), encoding));

// set a flag that at least one request parameter was added
added = true;

return this;
}

/**
* Builds the end result.
*
* @return String end result
*/
public String build() {
String url = buffer.toString();

if (url.length() > 2083) {
LOG.error("URL " + url + " is longer than 2083 chars (" + buffer.length() +
"). It may not work properly in old IE versions.");
}

return url;
}

/**
* Resets the internal state in order to be reused.
*
* @return RequestParameterBuilder reseted builder
*/
public RequestParameterBuilder reset() {
buffer = new StringBuilder(originalUrl);
jsonConverter.setType(null);
added = false;

return this;
}
}
A typically bean using the RequestParameterBuilder provides a parametrized URL by calling either paramJson(...) or param(...).
import java.io.Serializable;
import java.io.UnsupportedEncodingException;
import java.util.ArrayList;
import java.util.List;
import javax.annotation.PostConstruct;
import javax.faces.bean.ManagedBean;
import javax.faces.bean.SessionScoped;

/**
* UrlParameterProvider bean.
*/
@ManagedBean
@SessionScoped
public class UrlParameterProvider implements Serializable {

private String parametrizedUrl;

@PostConstruct
protected void initialize() {
RequestParameterBuilder rpBuilder = new RequestParameterBuilder("/views/examples/params.jsf");
try {
List<String> subscriptions = new ArrayList<String>();
tableBlockEntries.add("2");
tableBlockEntries.add("3");

// add the list to URL parameters with conversion to JSON
rpBuilder.paramJson("subscriptions", subscriptions, "java.util.List<java.lang.String>");

// add int values to URL parameters without conversion to JSON (just for example)
rpBuilder.param("min", 20);
rpBuilder.param("max", 80);
} catch (UnsupportedEncodingException e) {
throw new RuntimeException(e);
}

parametrizedUrl = rpBuilder.build();
}

public String getParametrizedUrl() {
return parametrizedUrl;
}
}
Using in XHTML - example with h:outputLink
<h:outputLink value="#{urlParameterProvider.parametrizedUrl}">
Parametrized URL
</h:outputLink>
Once the user clicks on the link and lands on the target page with the relative path /views/examples/params.jsf, he / she will see a pre-checked h:selectManyCheckbox.

The real world is more complicated. In the fact I've written a lot of custom converters having JsonConverter inside. So that instead of <pe:convertJson type="..." /> are custom converters attached. That subject is going beyond of this post.

"Alway in view" paradigm in web

$
0
0
I was thinking about writing the next post in my blog and remembered one well-known paradigm I used in my completed web projects. The paradigm is to show current element(s) to be navigated always in view, that means visible. You know, a classic web application can have a long content causing scrollbars in browser. For instance, a vertical scrollbar means there is a hidden content - above or below the current viewport. Not only the browser, a div element can have scrollbars and a viewport as well (as long as the style overflow:hidden is not set). Keeping important element(s) always in view increases the usability. If an element, which is expected to be shown, doesn't stay visible, the user is often confused and forced to navigate the element manually. Just two examples with screenshots and jQuery based solutions.

Assume we have two tables. The first table on the left side shows users in a system. Rows are clickable. User's details for a clicked row are shown in the second table on the right side.


The left table is big and when we're scrolling down, at certain point we can not see the right table at all. Now, a row click in the left table updates the right table, but it might be hidden due to its small length.


Is it user friendly? No. To overcome this problem we will implement a jQuery function which checks if a specified element is beyond the visible area.
$.fn.showTopInView = function () {
var winTop = $(window).scrollTop();
var bounds = this.offset();

if (winTop > bounds.top) {
$('html, body').animate({scrollTop: 0}, 'fast');
}
};
The .offset() method allows us to retrieve the current position of an element relative to the document. We compare element's top position with the amount we have scrolled from the topmost part of the page (calculated by $(window).scrollTop()). If the element (referenced with this) is located in the hidden area, its top position is less than this scrolled amount. In this case, we simple scroll to topmost part of the page with an animation. Using is simple. In our example, we should force execution of the following script when row clicking:
 
$('#IdOfTheRightTableContainer').showTopInView();
 
This can happen in onclick callback directly or streamed down as an JS script in response to the browser (if clicks cause AJAX requests). IdOfTheRightTableContainer is an Id of the div element the right table is placed in.

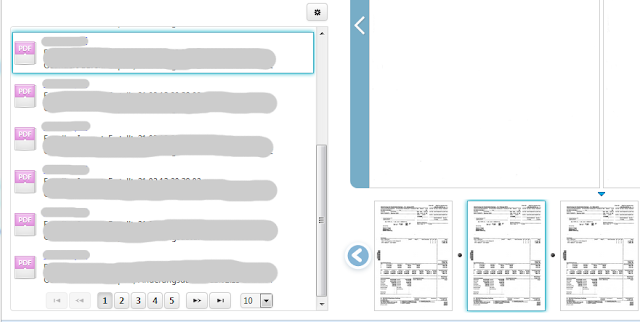
Another example is more complicated. As I said, scrollbars can also appear in div and hide inner elements. Assume again, we have a table included in such div container. The table displays some search results. e.g. documents and folders. Furthermore, assume we have thumbnails for every entry in this result table. User clicks on a thumbnail and want to see the related table's entry. The requirement thus - the table's entry of the selected thumbnail should be selected (highlighted) as well and should scroll to the div's viewport in order to always stay visible. The picture below demonstrates this behavior.


The script for solving this task uses the jQuery's method .position(). Other as .offset(), .position() retrieves the current position relative to the offset parent. The offset parent should be positioned (position: absolute or relative). In our example the offset parent is a relative positioned div element with the style class ui-layout-content (note: the web app used the jQuery Layout plugin). First, we need to write a function which will find the table's entry by some given identifier (here pid argument). This function gets invoked when user clicks on a thumbnail.
function selectResultEntryOnCurrentPage (pid) {
var $resultTable = $("#searchResultTable");
var $resultEntry = $resultTable.find(".resultEntry[data-pid='" + pid + "']");
$resultTable.find(".resultEntry").removeClass("selected");
$resultEntry.addClass("selected");

scrollToResultEntry ($resultTable, $resultEntry);
}
What we did here, was only a row selection. The table and the found table's entry are passed as parameters into the next function scrollToResultEntry. This function is responsible for keeping the selected entry visible.
function scrollToResultEntry ($resultTable, $resultEntry) {
// scroll to the entry with animation if it's not completely visible
var $scrollPane = $resultTable.closest(".ui-layout-content");
var entryPos = $resultEntry.position();
if (entryPos.top < 0) {
// element has parts in the hidden top area of the scrollable layout pane ==> scroll up
$scrollPane.animate({scrollTop: $scrollPane.scrollTop() + entryPos.top - 5}, "fast");
} else if ($scrollPane.height() < entryPos.top + $resultEntry.outerHeight()) {
// element has parts in the hidden bottom area of the scrollable layout pane ==> scroll down
$scrollPane.animate({
scrollTop: $scrollPane.scrollTop() + $resultEntry.outerHeight() + (entryPos.top - $scrollPane.height()) + 5}, "fast");
}
}
We measure the top position of the selected table's entry. Negative value means the entry is not completely visible and has some parts in the top area of the scrollable div (the mentioned offset parent). The second condition $scrollPane.height() < entryPos.top + $resultEntry.outerHeight() means the entry is not completely visible and has some parts in the bottom area of the scrollable div. In both cases, the entry is scrolled to the div's viewport with an animation. The new vertical scroll position is calculated (a little bit tricky) and set in the scrollTop option.

PrimeFaces Extensions 0.7 released

$
0
0
We are glad to announce the new 0.7 release of PrimeFaces Extensions. This is a main release which contains a lot of improvements and bug fixes. The full list of closed issues is on the GitHub. I would like to pick up some highlights.
  • AjaxErrorHandler
There are many, many fixes for pe:ajaxErrorHandler. The reason: more users, incl. team members of the Extensions project started to use this component. We are thinking now to add a support for non AJAX requests too. Let's see where we will end up.
  • ImportEnum
Enum values can be accessed on pages directly by the new pe:importEnum tag. Usage is demonstrated in this use case.
  • InputNumber
Thousand and decimal separators are Locale aware now. You don't need to pass a Locale as attribute - default values for thousand and decimal separators are taken in this way now
Locale locale = FacesContext.getCurrentInstance().getViewRoot().getLocale();                
java.text.DecimalFormatSymbols decimalFormatSymbols = new java.text.DecimalFormatSymbols(locale);
String thousandSeparator = Character.toString(decimalFormatSymbols.getGroupingSeparator());
String decimalSeparator = Character.toString(decimalFormatSymbols.getDecimalSeparator());
  • Exporter
This is a new component which provides many features such as export of multiple tables, sub-tables, tables with grouping, cell editing, dynamic columns, customized format, etc. It supports exporting of DataList and custom exporter via Java ServiceLoader mechanism. Demo is available here. This component is continuing to grow, more features are on TODO list.
  • DynaForm
DynaForm got some optimizations, e.g. new constructors without too much parameters and a new feature - varContainerId. varContainerId is a name of the variable which contains the prefix of the client Id within pe:dynaFormControl. This property allows to get the whole clientId of a component within pe:dynaFormControl. The whole client Id is sometimes required for JavaScript or RequestContext.update(...). Demo is available here. Users often asked how to update controls (cells) from another cells. We decided to implement a new use case to demonstrate this feature (I call it inter-control or inter-cell communication within pe:dynaForm). This nice use case demonstrates how to implement a class called ClearInputsExecutor for the PrimeFaces Extensions' ExecutableVisitCallback to clear all inputs / selects related to one row in pe:dynaForm.
  • Layout
Layout got the spacing_open and spacing_closed attributes which define spacing between adjacent layout panes. But the main improvement in this release is not this feature. Until now we only could use an instance of LayoutOptions in the options attributes of pe:layout tag. We thought, because LayoutOptions gets serialized to JSON to be able to be used in the underlying widget, it would be also nice to accept already serialized options as JSON string as well. This could increase the time of layout building when the layout is built during application startup in an application scoped bean. The options attribute accepts now a JSON string. Just call toJson() method on LayoutOptions and use it like this
<pe:layout options="#{layoutController.options}" ...>
@ManagedBean(eager=true)
@ApplicationScope
public class LayoutController implements Serializable {
private String options;

@PostConstruct
protected void initialize() {
LayoutOptions layoutOptions = new LayoutOptions();
LayoutOptions panes = new LayoutOptions();
panes.addOption("slidable", false);
...
layoutOptions.setPanesOptions(panes);
...

options = layoutOptions.toJson();
}

public String getOptions() {
return options;
}
}
This is a better choice in comparison to specifying options per attributes. Support of iframe acting as layout pane and updatable nested layouts were postponed to the next release.
  • TimePicker
TimePicker got a huge update. JS script was updated, fixed a collision with p:calendar and an issue in Chrome, but especially handy is a new attribute showOn. Similar to the PrimeFaces Calendar, this attribute defines the behavior when the timepicker is shown. focus (default): when the input gets focus, button: when the button trigger element is clicked, both: when the input gets focus and when the button is clicked. The online demo is available here.
  • Timeline
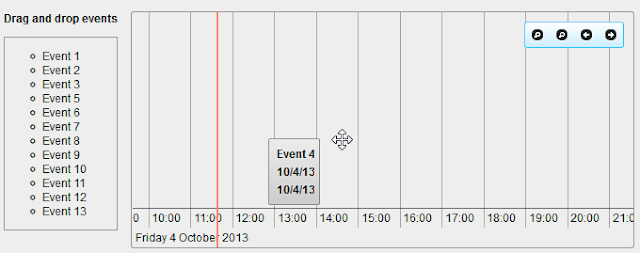
Timeline was reimplemented almost from scratch and this is the most interesting highlight of this release! First, thanks to the Applus IDIADA - company that sponsored the Timeline component. The new Timeline has features such as editable and read-only events, event's grouping, configurable zoom range, min. / max. dates for visible range, client-side and server-side API, i18n support, theming and more. We were excited to develop these interesting features. Explore various timeline features yourself, e.g. client-side API, server-side API or grouped events.


Timeline is highly interactive. The component provides a convenient server-side API to update its events smoothly. What does it mean? Approach for editing is similar to the PrimeFaces' Schedule, but the Schedule component provide a client-side widget's API method update() to update itself in oncomplete. The main goal is to avoid a DOM update of the component markup because is has a complex UI and can leads to flickers. The problem with update() is a separate AJAX request. So, we have two requests in the Schedule if we want to add or edit an event. The Timeline component provides a server-side API to update the component with only one request / response. So, you can update the UI on the server-side immediately when sending "update" request for a particular event. The main steps to do:
  1. Get thread-safe TimelineUpdater instance by timeline's Id (in terms of findComponent()).
  2. Invoke one or many (batch mode) CRUD operations, such as add, update, delete, deleteAll, clear, on the TimelineModel with the TimelineUpdater as parameter.
This is a paid component which has a quality. More features such as drag-and-drop from outside onto Timeline and connection arrows between dependent events are coming soon. As soon as the payment arrived, we will produce t-shirts for all team members and our friend Çağatay Çivici, the founder of PrimeFaces and PrimeTek. The first design looks like


Well, this was the first design, the word "PrimeFaces" is missing :-). It should be "PrimeFaces & Extensions". The back side doesn't show buildings as some readers may think. It shows the commit history on the GitHub :-).

What is the next? The project is stable. We have very small amount of open issues (around 20). This is a right time to grow. The next main release 1.0.0 will contain 3 new components! They will have the same quality as Timeline. The expected release date is tightly coupled with the upcoming PrimeFaces 4.0. Stay tuned.

JSF: choice between legacy components and fashionable performance killers

$
0
0
This blog post was originated due to performance issues in one big web application. Everybody optimizes Java code, but it seems nobody try to optimize the JavaScript code. Strange, because on the client-side there is much room for improvements. I would state, even more than on the server-side. We will analyse the perfomance of editable JSF standard components, sometimes called "legacy", and modern PrimeFaces components with rich JavaScript widgets. This is a neutral analyse, without to blame any library or any person. Only facts.

Well. What do we want to test? The goal is to measure the client-side perfomance (without backend logic) of JS script block executions for PrimeFaces p:inputText / p:selectOneMenu. We want to test an editable p:dataTable with inputs / selects components in table cells. The table has 25 rows and 16 columns, that means 25 * 16 = 400 cells. Every cell contains either an input or a select component. There are 6 test cases. Standard h:inputText and h:selectOneMenu don't have JS script blocks, so it is interesting to see what for impact JS widgets have.


The entire test project is available on GitHub. Simple clone or download it and run with built-in Maven Jetty plugin. The page load speed is measured with the new Navigation Timing JavaScript API for accurately measuring performance on the web. The API provides a simple way to get accurate and detailed timing statistics. It's more precise than using JS Date object. The Navigation Timing JavaScript API is available in Internet Explorer 9 and higher, last versions of Google Chrome and Firefox. The code to measure the time after the current response has been arrived until the window onload event is fired is shown on the GitHub.

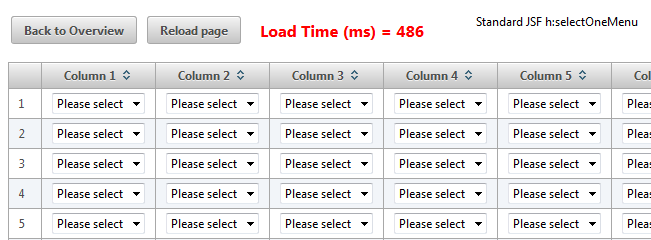
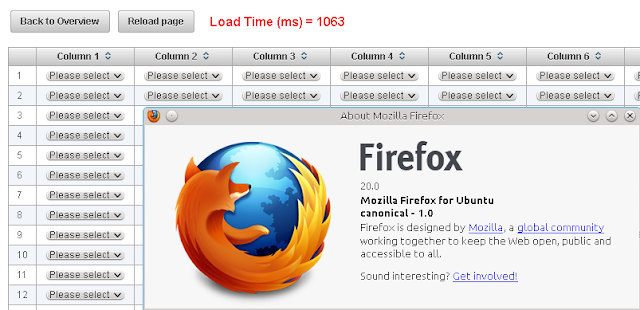
JavaScript is single-threaded, so let's see how sequential script block executions can slow down displaying a web page. If we only test h:inputText and p:inputText, the difference is marginal. The page load time is almost the same. Running on Windows 7 and Firefox 20.0.1 I could only see that the table with p:inputText needs ca. 200-300 ms more than the table with h:inputText. This is a good result which means the JS script execution for one p:inputText takes less than 1 ms. Really good. Congrats to PrimeFaces. A mix test with inputs and selects shown that the page with PrimeFaces components takes approximately 1.5 sek. more than the page with standard components. Adding more PrimeFaces select components slows the page rendering time down. Extreme case is to have only p:selectOneMenu components. This is a perfomance killer and the reason why our web application was too slow. Internet Explorer shows the well-known error message "A script on this page is causing Internet Explorer to run slowly". Take a look at page load time self.

Running on Windows 7 and Firefox 20.0.1

h:selectOneMenu


p:selectOneMenu


If we assume that component renderers take approximately the same time to render HTML output, we can calculate the time for JS script block execution of a single p:selectOneMenu. This time is 11,3 ms. That's too much. The reason may be many inefficient jQuery selectors in widget's constructor. I don't know and it doesn't matter here. On my notebook with Ubuntu, I got a huge time difference ca. 10 sek. The browser with 400 p:selectOneMenu tags almost "freezes".

Running on Kubuntu 12.04 and Firefox 20.0

h:selectOneMenu


p:selectOneMenu


Conclusion

Some people say "JSF is slow, JSF is not a right technology". Wrong. JSF is fast enough. It depends on how to use this framework. Editing of everything at once is nice, but obviously it is not recommended to use a large editable DataTable with rich JSF components. What would be an alternative for editable DataTable? There are many ways, depending on individual preferences. I will try to propose some ones.
  1. Use standard JSF select components in large editable tables. But what is with theming? No problem. All modern browser, also IE8 and higher allow to style native HTML select elements. You can adjust colors for borders, background and let selects look more or less stylish according to applied theme. Presupposed is of course, you don't need advanced features such as custom content within select components (filter functionality or whatever).
  2. Cell editing feature in PrimeFaces renders native select elements and it is fast.
  3. Row editing feature in PrimeFaces renders native select elements and it seems to be also fast.
  4. Master-Detail approach in one view. You select a row and see details to edit. Details can be shown outside of the table - on the right side or at the top, depending on table's width / height.
  5. Master-Detail approach with separate views. You select a row and switch the views. Instead of table, you see details like in the MasterDetail component of PrimeFaces Extensions. From details you can go on to another levels to create / edit more details and then, at the end, jump to the overview table again.
I hope, you enjoyed this post :-). Comments and suggestions are welcome.

Multiple dynamic includes with one JSF tag

$
0
0
Every JSF developer knows the ui:include and ui:param tags. You can include a facelet (XHTML file) and pass an object, which will be available in the included facelet, as follows

<ui:include src="/sections/columns.xhtml">
<ui:param name="columns" value="#{bean.columns}"/>
</ui:include>
So, you can e.g. use it within a PrimeFaces DataTable with dynamich columns (p:columns)

<p:dataTable value="#{bean.entries}" var="data" rowKey="#{data.id}" ...>
...
<ui:include src="/sections/columns.xhtml">
<ui:param name="data" value="#{data}"/>
<ui:param name="columns" value="#{bean.columns}"/>
</ui:include>

</p:dataTable>
where the included facelet could contain this code

<ui:composition xmlns="http://www.w3.org/1999/xhtml"
xmlns:p="http://primefaces.org/ui"
xmlns:ui="http://java.sun.com/jsf/facelets"
...>
<p:columns value="#{columns}" var="column">
<f:facet name="header">
<h:outputText value="#{msgs[column.header]}"/>
</f:facet>

// place some input / select or complex composite component for multiple data types here.
// a simple example for demonstration purpose:
<p:inputText value="#{data[column.property]}"/>
</p:columns>
</ui:composition>
#{bean.columns} refers to a List of special objects which describe the columns. I will name such objects ColumnModel. So, it is a List<ColumnModel>. A ColumnModel has e.g. the attributes header and property.

Go on. Now, if we want to add a support for sorting / filtering, we can use dynamic paths which refer to specific facelet files containg sorting or / and filtering feature(s). Simple bind the src attribute to a bean property.
<ui:include src="#{bean.columnsIncludeSrc}">
<ui:param name="data" value="#{data}"/>
<ui:param name="columns" value="#{bean.columns}"/>
</ui:include>
The bean has something like
private boolean isFilterRight;
private boolean isSortRight

// setter / getter

public String getColumnsIncludeSrc() {
if (isFilterRight && isSortRight) {
return "/include/columnsTableFilterSort.xhtml";
} else if (isFilterRight && !isSortRight) {
return "/include/columnsTableFilter.xhtml";
} else if (!isFilterRight && isSortRight) {
return "/include/columnsTableSort.xhtml";
} else {
return "/include/columnsTable.xhtml";
}
}
Different facelets are included dependent on the set boolean rights. So, the decision about what file to be included is placed within a bean. To be more flexible, we can encapsulate the table in a composite component and move the decision logic to the component class.

<cc:interface componentType="xxx.component.DataTable">
<cc:attribute name="id" required="false" type="java.lang.String"
shortDescription="Unique identifier of the component in a NamingContainer"/>
<cc:attribute name="entries" required="true"
shortDescription="The data which are shown in the datatable. This is a list of object representing one row."/>
<cc:attribute name="columns" required="true" type="java.util.List"
shortDescription="The columns which are shown in the datatable. This is a list of instances of type ColumnModel."/>
...
</cc:interface>
<cc:implementation>
<p:dataTable value="#{cc.attrs.entries}" var="data" rowKey="#{data.id}" ...>
...
<ui:include src="#{cc.columnsIncludeSrc}">
<ui:param name="data" value="#{data}"/>
<ui:param name="columns" value="#{cc.attrs.columns}"/>
</ui:include>

</p:dataTable>
</cc:implementation>
How does ui:include work? This is a tag handler which is applied when the view is being built. In JSF 2, the component tree is built twice on POST requests, once in RESTORE_VIEW phase and once in RENDER_RESPONSE phase. On GET it is built once in the RENDER_RESPONSE phase. This behavior is specified in the JSF 2 specification and is the same in Mojarra and MyFaces. The view building in the RENDER_RESPONSE is necessary in case the page author uses conditional includes or conditional templates. So, you can be sure that the src attribute of the ui:include gets evaluated shortly before the rendering phase.

But come to the point! What I wrote until now was an introduction for a motivation to extend ui:include. Recently, I got a task to use a p:dataTable with dynamic columns and p:rowEditor. Like this one in the PrimeFaces showcase. The problem is only - such editing feature doesn't support p:columns. My idea was to add p:column tags multiple times, dynamically, but with different context parameters. You can imagine this as ui:include with ui:param in a loop. In the example above we intend to iterate over the List<ColumnModel>. Each loop iteration should make an instance of type ColumnModel available in the included facelet. So, I wrote a custom tag handler to include any facelet multiple times.
package xxx.taghandler;

import xxx.util.VariableMapperWrapper;
import java.io.IOException;
import java.util.List;
import java.util.UUID;
import javax.el.ExpressionFactory;
import javax.el.ValueExpression;
import javax.el.VariableMapper;
import javax.faces.component.UIComponent;
import javax.faces.view.facelets.FaceletContext;
import javax.faces.view.facelets.TagAttribute;
import javax.faces.view.facelets.TagAttributeException;
import javax.faces.view.facelets.TagConfig;
import javax.faces.view.facelets.TagHandler;

/**
* Tag handler to include a facelet multiple times with different contextes (objects from "value").
* The attribute "value" can be either of type java.util.List or array.
* If the "value" is null, the tag handler works as a standard ui:include.
*/
public class InlcudesTagHandler extends TagHandler {

private final TagAttribute src;
private final TagAttribute value;
private final TagAttribute name;

public InlcudesTagHandler(TagConfig config) {
super(config);

this.src = this.getRequiredAttribute("src");
this.value = this.getAttribute("value");
this.name = this.getAttribute("name");
}

@Override
public void apply(FaceletContext ctx, UIComponent parent) throws IOException {
String path = this.src.getValue(ctx);
if ((path == null) || (path.length() == 0)) {
return;
}

// wrap the original mapper - this is important when some objects passed into include via ui:param
// because ui:param invokes setVariable(...) on the set variable mappper instance
VariableMapper origVarMapper = ctx.getVariableMapper();
ctx.setVariableMapper(new VariableMapperWrapper(origVarMapper));

try {
this.nextHandler.apply(ctx, null);

ValueExpression ve = (this.value != null) ? this.value.getValueExpression(ctx, Object.class) : null;
Object objValue = (ve != null) ? ve.getValue(ctx) : null;

if (objValue == null) {
// include facelet only once
ctx.includeFacelet(parent, path);
} else {
int size = 0;

if (objValue instanceof List) {
size = ((List) objValue).size();
} else if (objValue.getClass().isArray()) {
size = ((Object[]) objValue).length;
}

final ExpressionFactory exprFactory = ctx.getFacesContext().getApplication().getExpressionFactory();
final String strName = this.name.getValue(ctx);

// generate unique Id as a valid Java identifier and use it as variable for the provided value expression
final String uniqueId = "a" + UUID.randomUUID().toString().replaceAll("-", "");
ctx.getVariableMapper().setVariable(uniqueId, ve);

// include facelet multiple times
StringBuilder sb = new StringBuilder();
for (int i = 0; i < size; i++) {
if ((strName != null) && (strName.length() != 0)) {
// create a new value expression in the array notation and bind it to the variable "name"
sb.append("#{");
sb.append(uniqueId);
sb.append("[");
sb.append(i);
sb.append("]}");

ctx.getVariableMapper().setVariable(strName,
exprFactory.createValueExpression(ctx, sb.toString(), Object.class));
}

// included facelet can access the created above value expression
ctx.includeFacelet(parent, path);

// reset for next iteration
sb.setLength(0);
}
}
} catch (IOException e) {
throw new TagAttributeException(this.tag, this.src, "Invalid path : " + path);
} finally {
// restore original mapper
ctx.setVariableMapper(origVarMapper);
}
}
}
The most important call is ctx.includeFacelet(parent, path). The method includeFacelet(...) from the JSF API includes the facelet markup at some path relative to the current markup. The class VariableMapperWrapper is used for a name to value mapping via ui:param. For the example with columns the variable column will be mapped to expressions #{columns[0]}, #{columns[1]}, etc. before every includeFacelet(...) call as well. Well, not exactly to these expressions, at place of columns should be an unique name mapped again to the columns object (to avoid possible name collisions). The mapper class looks like as follows
package xxx.util;

import java.util.HashMap;
import java.util.Map;
import javax.el.ELException;
import javax.el.ValueExpression;
import javax.el.VariableMapper;

/**
* Utility class for wrapping a VariableMapper. Modifications occur to the internal Map instance.
* The resolving occurs first against the internal Map instance and then against the wrapped VariableMapper
* if the Map doesn't contain the requested ValueExpression.
*/
public class VariableMapperWrapper extends VariableMapper {

private final VariableMapper wrapped;

private Map<String, ValueExpression> vars;

public VariableMapperWrapper(VariableMapper orig) {
super();
this.wrapped = orig;
}

@Override
public ValueExpression resolveVariable(String variable) {
ValueExpression ve = null;
try {
if (this.vars != null) {
// try to resolve against the internal map
ve = this.vars.get(variable);
}

if (ve == null) {
// look in the wrapped variable mapper
return this.wrapped.resolveVariable(variable);
}

return ve;
} catch (Throwable e) {
throw new ELException("Could not resolve variable: " + variable, e);
}
}

@Override
public ValueExpression setVariable(String variable, ValueExpression expression) {
if (this.vars == null) {
this.vars = new HashMap<String, ValueExpression>();
}

return this.vars.put(variable, expression);
}
}
Register the tag handler in a taglib XML file and you are done.

<tag>
<tag-name>includes</tag-name>
<handler-class>xxx.taghandler.InlcudesTagHandler</handler-class>
<attribute>
<description>
<![CDATA[The relative path to a XHTML file to be include one or multiple times.]]>
</description>
<name>src</name>
<required>true</required>
<type>java.lang.String</type>
</attribute>
<attribute>
<description>
<![CDATA[Objects which should be available in the included XHTML files. This attribute can be either
of type java.util.List or array. If it is null, the tag handler works as a standard ui:include.]]>
</description>
<name>value</name>
<required>false</required>
<type>java.lang.Object</type>
</attribute>
<attribute>
<description>
<![CDATA[The name of the parameter which points to an object of each iteration over the given value.]]>
</description>
<name>name</name>
<required>false</required>
<type>java.lang.String</type>
</attribute>
</tag>
Now I was able to use it in a composite component as

<p:dataTable value="#{cc.attrs.entries}" var="data" rowKey="#{data.id}" ...>
...
<custom:includes src="#{cc.columnsIncludeSrc}" value="#{cc.attrs.columns}" name="column">
<ui:param name="data" value="#{data}"/>
</custom:includes>

</p:dataTable>
A typically facelet file (and the component tree) contains a quite regular p:column tag which means we are able to use all DataTable's features!

<ui:composition xmlns="http://www.w3.org/1999/xhtml"
xmlns:p="http://primefaces.org/ui"
xmlns:ui="http://java.sun.com/jsf/facelets"
...>
<p:column headerText="#{msgs[column.header]}">
<p:cellEditor>
<f:facet name="output">
<custom:typedOutput outputType="#{column.outputTypeName}"
typedData="#{column.typedData}"
value="#{data[column.property]}"
timeZone="#{cc.timeZone}"
calendarPattern="#{cc.calendarPattern}"
locale="#{cc.locale}"/>
</f:facet>

<f:facet name="input">
<custom:typedInput inputType="#{column.inputTypeName}"
typedData="#{column.typedData}"
label="#{column.inputTypeName}"
value="#{data[column.property]}"
onchange="highlightEditedRow(this)"
timeZone="#{cc.timeZone}"
calendarPattern="#{cc.calendarPattern}"
locale="#{cc.locale}"/>
</f:facet>
</p:cellEditor>
</p:column>
</ui:composition>


Note: This approach can be applied to another components and use cases. The InlcudesTagHandler works universell. For instance, I can imagine to create a dynamic Menu component in PrimeFaces without an underlying MenuModel. A list or array of some model class is still needed of course :-).

PrimeFaces Extensions 0.7.1 released

$
0
0
We are glad to announce a maintenance release of PrimeFaces Extensions 0.7.1. This release only contains fixed issues. The full list is on the GitHub. Updated components are Exporter, KeyFilter, Layout, TimePicker and Timeline.

The release is already available in the Maven central repository. Getting Started is as usually here. The theme of the showcase was changed to redmond. We are normally doing this to distinguish separate releases from each other.

Now it is a good time for some new components, so we will add a couple of them. Stay tuned.

Proper decoding of URL parameters on the server-side in JBoss

$
0
0
I spent many hours today to figure out how to force a proper decoding of encoded characters in JSF applications running on JBoss (using JBoss 7 Final). The problem occurs when you have e.g. chinese characters passed through URL. Assume you have 指事, encoded as %E6%8C%87%E4%BA%8B. Surprise, but these characters arrive you on the server-side as 指事. They are decoded by server automatically with ISO-8859-1. So, it doesn't matter if you try to decode it by yourself like

FacesContext fc = FacesContext.getCurrentInstance();
String param = fc.getExternalContext().getRequestParameterMap().get(name);
String decodedParam = java.net.URLDecoder.decode(param, "UTF-8");
It doesn't help because characters were already wrong decoded and you get them already wrong decoded from the request parameter map. It doesn't help too if you have on the page

<meta http-equiv="Content-Type" content="text/html; charset=UTF-8"/>
To overcome this bug you need two things: a special character encoding filter and a configuration in JBoss' standalone.xml. The filter should set the configured encoding for both request and response.

public class CharacterEncodingFilter implements Filter {

/** The default character encoding to set for request / response. */
private String encoding = null;

/** The filter configuration object. */
private FilterConfig filterConfig;

/** Should a character encoding specified by the client be ignored? */
private boolean ignore = true;

public void destroy() {
encoding = null;
filterConfig = null;
}

public void doFilter(ServletRequest request, ServletResponse response, FilterChain chain) throws IOException,
ServletException {
// conditionally select and set the character encoding to be used
if ((ignore || (request.getCharacterEncoding() == null)) && (encoding != null)) {
request.setCharacterEncoding(encoding);
response.setCharacterEncoding(encoding);
}

// pass control on to the next filter
chain.doFilter(request, response);
}

public void init(FilterConfig filterConfig) throws ServletException {
this.filterConfig = filterConfig;
this.encoding = filterConfig.getInitParameter("encoding");

String value = filterConfig.getInitParameter("ignore");

this.ignore = ((value == null) || value.equalsIgnoreCase("true") || value.equalsIgnoreCase("yes"));
}
}
Note: It will not help if you only set the encoding for request. You should also set it for response by response.setCharacterEncoding(encoding). Configuration in web.xml looks like
<filter>
<filter-name>CharacterEncodingFilter</filter-name>
<filter-class>xyz.mypackage.CharacterEncodingFilter</filter-class>
<init-param>
<description>override any encodings from client</description>
<param-name>ignore</param-name>
<param-value>true</param-value>
</init-param>
<init-param>
<description>the encoding to use</description>
<param-name>encoding</param-name>
<param-value>UTF-8</param-value>
</init-param>
</filter>
<filter-mapping>
<filter-name>CharacterEncodingFilter</filter-name>
<url-pattern>*.jsf</url-pattern>
</filter-mapping>
Now you have to add following system properties to the standalone.xml, direct after the closing <extensions> tag:
<system-properties>
<property name="org.apache.catalina.connector.URI_ENCODING" value="UTF-8"/>
<property name="org.apache.catalina.connector.USE_BODY_ENCODING_FOR_QUERY_STRING" value="true"/>
</system-properties>
From the docu:
  • org.apache.catalina.connector.URI_ENCODING specifies the character encoding used to decode the URI bytes, after %xx decoding the URL. If not specified, ISO-8859-1 will be used.
  • org.apache.catalina.connector.USE_BODY_ENCODING_FOR_QUERY_STRING specifies if the encoding specified in contentType should be used for URI query parameters, instead of using the org.apache.catalina.connector.URI_ENCODING. This setting is present for compatibility with Tomcat 4.1.x, where the encoding specified in the contentType, or explicitely set using Request.setCharacterEncoding method was also used for the parameters from the URL. The default value is false.
JBoss looks now set character encoding for response and decodes URL parameters with it. I hope this info will help you to save your time.

Monitor full page, non AJAX, requests to be notified

$
0
0
Recently, working on new charts and chart "exporting service" in JSF, I've faced a quite common problem. When you execute a long-running task (action), you would like to show a status "Please wait ..." dialog on start and close this dialog at the end, when the response arrives. This is not a problem for AJAX requests, but it is problematic for non AJAX requests which stream some binary content to the browser. To solve this issue, we can use the same technique as for instance the FileDownload component in PrimeFaces uses. We can set a special cookie in response and check this cookie periodically on the client-side if it is set. When this cookie is set, we can close the opened before dialog. The cookie can be set in JSF as
// set cookie to be able to ask it and close status dialog for example
FacesContext.getCurrentInstance().getExternalContext().addResponseCookie(
"cookie.chart.exporting", "true", Collections.<String, Object>emptyMap());
Non AJAX button executes an JavaScript function, say monitorExporting, with two parameters which represent another JavaScript functions to be called at the beginning and the end of the request / response lifecycle.
<p:commandButton value="Export to PNG" ajax="false" action="#{combiChartController.exportToPng}"
onclick="monitorExporting(start, stop)"/>
PrimeFaces already provides methods to check if cookies are enabled, to get and delete them. So, we can write
function monitorExporting(start, complete) {
if(PrimeFaces.cookiesEnabled()) {
if(start) {
start();
}

window.chartExportingMonitor = setInterval(function() {
var exportingComplete = PrimeFaces.getCookie('cookie.chart.exporting');

if(exportingComplete === 'true') {
if(complete) {
complete();
}

clearInterval(window.chartExportingMonitor);
PrimeFaces.setCookie('cookie.chart.exporting', null);
}
}, 150);
}
}
The cookie is asked periodically with the setInterval(...). The function start shows the "Please wait ..." dialog and the function stop closes it.
<script type="text/javascript">
/* <![CDATA[ */
function start() {
statusDialog.show();
}

function stop() {
statusDialog.hide();
}
/* ]]> */
</script>
If cookies are disabled, nothing is shown of course, but it is normally a rare case.

New release of Maven resource optimization plugin

Simple and lightweight pool implementation

$
0
0
Object pools are containers which contain a specified amount of objects. When an object is taken from the pool, it is not available in the pool until it is put back. Objects in the pool have a lifecycle: creation, validation, destroying, etc. A pool helps to manage available resources in a better way. There are many using examples. Especially in application servers there are data source pools, thread pools, etc. Pools should be used in cases such as
  • High-frequency using of the same objects
  • Objects are very big and consume much memory
  • Objects need much time for initialization
  • Objects use massive IO operations (Streams, Sockets, DB, etc.)
  • Objects are not thread-safe
When I looked for a pool implementation for one of my Java projects, I found that many people reference the Apache Commons Pool. Apache Commons Pool provides an object-pooling API. There are interfaces ObjectPool, ObjectPoolFactory, PoolableObjectFactory and many implementations. A pool provides methods addObject, borrowObject, invalidateObject, returnObject to add, take, remove and return back objects. PoolableObjectFactory defines the behavior of objects within a pool and provides various callbacks for pool's operations.

After looking into the implementation details I found that Apache Commons Pool is not a lightweight implementation which is an overhead for my purposes. Furthermore, it uses the old Java's keyword synchronized for a lot of methods which is not recommended for using. Java 5 introduced Executor framework for Java concurrency (multi-threading). The Executor framework is preferable here. I decided to implement a simple and lightweight pool which I would like to present here. It is only one Java class. I think it is enough if you don't need callbacks and other advanced stuff. I created a project easy-pool on GitHub.

The pool implementation is based on ConcurrentLinkedQueue from the java.util.concurrent package. ConcurrentLinkedQueue is a thread-safe queue based on linked nodes. This queue orders elements by FIFO principle (first-in-first-out). My implementation for a generic pool looks as follows
import java.util.concurrent.ConcurrentLinkedQueue;
import java.util.concurrent.Executors;
import java.util.concurrent.ScheduledExecutorService;
import java.util.concurrent.TimeUnit;

public abstract class ObjectPool<T>
{
private ConcurrentLinkedQueue<T> pool;

private ScheduledExecutorService executorService;

/**
* Creates the pool.
*
* @param minIdle minimum number of objects residing in the pool
*/
public ObjectPool(final int minIdle) {
// initialize pool
initialize(minIdle);
}

/**
* Creates the pool.
*
* @param minIdle minimum number of objects residing in the pool
* @param maxIdle maximum number of objects residing in the pool
* @param validationInterval time in seconds for periodical checking of minIdle / maxIdle conditions in a separate thread.
* When the number of objects is less than minIdle, missing instances will be created.
* When the number of objects is greater than maxIdle, too many instances will be removed.
*/
public ObjectPool(final int minIdle, final int maxIdle, final long validationInterval) {
// initialize pool
initialize(minIdle);

// check pool conditions in a separate thread
executorService = Executors.newSingleThreadScheduledExecutor();
executorService.scheduleWithFixedDelay(new Runnable()
{
@Override
public void run() {
int size = pool.size();
if (size < minIdle) {
int sizeToBeAdded = minIdle - size;
for (int i = 0; i < sizeToBeAdded; i++) {
pool.add(createObject());
}
} else if (size > maxIdle) {
int sizeToBeRemoved = size - maxIdle;
for (int i = 0; i < sizeToBeRemoved; i++) {
pool.poll();
}
}
}
}, validationInterval, validationInterval, TimeUnit.SECONDS);
}

/**
* Gets the next free object from the pool. If the pool doesn't contain any objects,
* a new object will be created and given to the caller of this method back.
*
* @return T borrowed object
*/
public T borrowObject() {
T object;
if ((object = pool.poll()) == null) {
object = createObject();
}

return object;
}

/**
* Returns object back to the pool.
*
* @param object object to be returned
*/
public void returnObject(T object) {
if (object == null) {
return;
}

this.pool.offer(object);
}

/**
* Shutdown this pool.
*/
public void shutdown() {
if (executorService != null) {
executorService.shutdown();
}
}

/**
* Creates a new object.
*
* @return T new object
*/
protected abstract T createObject();

private void initialize(final int minIdle) {
pool = new ConcurrentLinkedQueue<T>();

for (int i = 0; i < minIdle; i++) {
pool.add(createObject());
}
}
}
The abstract class ObjectPool provides two main methods: borrowObject to get the next free object from the pool and returnObject to return the borrowed object back to the pool. If the pool doesn't contain any objects, a new object will be created and given back to the caller of the method borrowObject. The object creation happens in the method createObject. Any class which extends the abstract class ObjectPool only needs to implement this method and the pool is ready to use. As you can see I also utilizes ScheduledExecutorService from the java.util.concurrent package. What it is good for? You can specifies minimum and maximum number of objects residing in the pool. ScheduledExecutorService starts a special task in a separate thread and observes periodical in a specified time (parameter validationInterval) the minimum and maximum number of objects in the pool. When the number of objects is less than the minimum, missing instances will be created. When the number of objects is greater than the maximum, too many instances will be removed. This is sometimes useful for the balance of memory consuming objects in the pool and more.

Let's implement test classes to show using of a concrete pool. First, we need a class representing objects in the pool which simulates a time-consuming process. This class, called ExportingProcess, needs some time to be instantiated.
public class ExportingProcess {

private String location;

private long processNo = 0;

public ExportingProcess(String location, long processNo) {
this.location = location;
this.processNo = processNo;

// doing some time expensive calls / tasks
// ...

// for-loop is just for simulation
for (int i = 0; i < Integer.MAX_VALUE; i++) {
}

System.out.println("Object with process no. " + processNo + " was created");
}

public String getLocation() {
return location;
}

public long getProcessNo() {
return processNo;
}
}
The second class implements the Runnable interface and simulates some task doing by a thread. In the run method, we borrow an instance of ExportingProcess and return it later back to the pool.
public class ExportingTask implements Runnable {

private ObjectPool<ExportingProcess> pool;

private int threadNo;

public ExportingTask(ObjectPool<ExportingProcess> pool, int threadNo) {
this.pool = pool;
this.threadNo = threadNo;
}

public void run() {
// get an object from the pool
ExportingProcess exportingProcess = pool.borrowObject();

System.out.println("Thread " + threadNo +
": Object with process no. " + exportingProcess.getProcessNo() + " was borrowed");

// do something
// ...

// for-loop is just for simulation
for (int i = 0; i < 100000; i++) {
}

// return ExportingProcess instance back to the pool
pool.returnObject(exportingProcess);

System.out.println("Thread " + threadNo +
": Object with process no. " + exportingProcess.getProcessNo() + " was returned");
}
}
Now, in the JUnit class TestObjectPool, we create a pool of objects of type ExportingProcess. This occurs by means of new ObjectPool<ExportingProcess>(4, 10, 5). Parameters are described in the comments below.
import org.junit.After;
import org.junit.Before;
import org.junit.Test;

import java.util.concurrent.ExecutorService;
import java.util.concurrent.Executors;
import java.util.concurrent.TimeUnit;
import java.util.concurrent.atomic.AtomicLong;

public class TestObjectPool
{
private ObjectPool<ExportingProcess> pool;

private AtomicLong processNo = new AtomicLong(0);

@Before
public void setUp() {
// Create a pool of objects of type ExportingProcess. Parameters:
// 1) Minimum number of special ExportingProcess instances residing in the pool = 4
// 2) Maximum number of special ExportingProcess instances residing in the pool = 10
// 3) Time in seconds for periodical checking of minIdle / maxIdle conditions in a separate thread = 5.
// When the number of ExportingProcess instances is less than minIdle, missing instances will be created.
// When the number of ExportingProcess instances is greater than maxIdle, too many instances will be removed.
// If the validation interval is negative, no periodical checking of minIdle / maxIdle conditions
// in a separate thread take place. These boundaries are ignored then.
pool = new ObjectPool<ExportingProcess>(4, 10, 5)
{
protected ExportingProcess createObject() {
// create a test object which takes some time for creation
return new ExportingProcess("/home/temp/", processNo.incrementAndGet());
}
};
}

@After
public void tearDown() {
pool.shutdown();
}

@Test
public void testObjectPool() {
ExecutorService executor = Executors.newFixedThreadPool(8);

// execute 8 tasks in separate threads
executor.execute(new ExportingTask(pool, 1));
executor.execute(new ExportingTask(pool, 2));
executor.execute(new ExportingTask(pool, 3));
executor.execute(new ExportingTask(pool, 4));
executor.execute(new ExportingTask(pool, 5));
executor.execute(new ExportingTask(pool, 6));
executor.execute(new ExportingTask(pool, 7));
executor.execute(new ExportingTask(pool, 8));

executor.shutdown();
try {
executor.awaitTermination(30, TimeUnit.SECONDS);
} catch (InterruptedException e) {
e.printStackTrace();
}
}
}
A test output looks like
Object with process no. 1 was created
Object with process no. 2 was created
Object with process no. 3 was created
Object with process no. 4 was created
Thread 2: Object with process no. 2 was borrowed
Thread 1: Object with process no. 1 was borrowed
Thread 2: Object with process no. 2 was returned
Thread 3: Object with process no. 3 was borrowed
Thread 4: Object with process no. 4 was borrowed
Thread 1: Object with process no. 1 was returned
Thread 4: Object with process no. 4 was returned
Thread 8: Object with process no. 4 was borrowed
Thread 5: Object with process no. 1 was borrowed
Thread 7: Object with process no. 3 was borrowed
Thread 3: Object with process no. 3 was returned
Thread 6: Object with process no. 2 was borrowed
Thread 7: Object with process no. 3 was returned
Thread 5: Object with process no. 1 was returned
Thread 8: Object with process no. 4 was returned
Thread 6: Object with process no. 2 was returned
As can be seen, the first thread accessing the pool creates the minimum objects residing in the pool. Running this test class multiple times, we can discover that sometimes 4 objects get borrowed each after other and a new 5. object will be created in the pool. All test classes are available in the GitHub.

New features in BlockUI of PrimeFaces Extensions

$
0
0
PrimeFaces users were worried if we will keep the BlockUI component in the PrimeFaces Extensions. Yes, we will keep it. It was done compatible with the upcoming PrimeFaces 4.0 and got some updates / new features.

The main features:
  • Page blocking. The entire page can be blocked if you don't define the target attribute.
  • Non-centered message. A non-centered message is defined by the css and centerX / centerY attributes. Furthermore, you can use the cssOverlay attribute to style the overlay (half-transparent mask).
  • Auto-unblocking. The timeout attribute is helpful for auto-unblocking. It defines time in millis to wait before auto-unblocking.

All featutes are demonstrated in the following code snippet and the screenshot
<p:commandButton value="Block this page!" type="button"
onclick="PF('blockUIWidget').block()"/>

<pe:blockUI widgetVar="blockUIWidget"
css="{top: '10px', left: '', right: '10px', cursor: 'wait'}"
cssOverlay="{backgroundColor: 'red'}"
timeout="2000"
centerY="false">
<h:panelGrid columns="2">
<h:graphicImage library="images" name="ajax-loader1.gif"
style="margin-right: 12px; vertical-align: middle;"/>
<h:outputText value="This is a non-centered message. Please wait..." style="white-space: nowrap;"/>
</h:panelGrid>
</pe:blockUI>


 Have fun!

PrimeFaces Extensions 1.0.0.RC1 released

$
0
0
We are glad to announce the first release candidate 1.0.0.RC1 of PrimeFaces Extensions. This release is fully compatible with the PrimeFaces 4.0.RC1 (codename SENTINEL). Once the PrimeFaces 4.0 final is released, we will also release the 1.0.0 final version.

This is a big step forwards. The community can use this release with JSF 2.0 and JSF 2.2. The full list of closed issues is available on the GitHub.

Among other changes please consider the removing of ResetInput component since this functionality is now available in the PrimeFaces 4.0 and JSF 2.2. CKEditor was updated to the version 4, the Exporter and BlockUI components got many improvements. I have already blogged about some significant changes in BlockUI. The next post will be about new features in the Timeline component. It is e.g. capable to load events lazy.

Stay tuned and have fun!

Timeline component features lazy loading

$
0
0
The first release candidate 1.0.0.RC1 of the PrimeFaces Extensions brought one new of two planned features for the Timeline component. This component supports lazy loading of events during moving / zooming in the timeline. This makes sense when event's loading is time-consuming. Unlike Schedule component in the PrimeFaces it didn't introduce a new LazyTimelineModel. The model class stays the same - TimelineModel. Events are loaded lazy when p:ajax with event="lazyload" is attached to the pe:timeline tag. This new AJAX behaviour has several advantages in comparison to the approach with the "lazy model". It is consistent with other AJAX events such as add, delete, rangechanged, etc. You can disable / enable the "lazyload" AJAX behavior at runtime and execute a custom JS script on start / complete. Example:
<p:ajax event="lazyload" disabled="#{lazyTimelineController.disabled}"
listener="#{lazyTimelineController.onLazyLoad}"
onstart="PF('dialogWidget').show()"
oncomplete="PF('dialogWidget').hide()"/>
And of course you can control exactly what should be executed and updated (process / update attributes). To understand how this new feature works (before posting a lot of code :-)) I sketched one diagram. Please read from top to down.


On intial page load, only events in the visible time range should be lazy loaded. After moving to the right or left direction, area on the right or left side is coming into the view. Only events in this new displayed time range should be loaded. Time range with already loaded events is cached internally (read line in the diagram). When you zoom out now, you will probably have two time ranges the events should be loaded for. This is demonstrated in the 4. use case. When you zoom in, no AJAX event for lazy loading is sent. It is very smart! As you can see, the "lazyload" listener is not invoked again when the visible time range (incl. some hidden ranges defined by preloadFactor) already has lazy loaded events.

What is preloadFactor? The preloadFactor attribute of the pe:timeline is a positive float value or 0 (default). When the lazy loading feature is active, the calculated time range for preloading will be multiplicated by the preload factor. The result of this multiplication specifies the additional time range which will be considered for the preloading during moving / zooming too. For example, if the calculated time range for preloading is 5 days and the preload factor is 0.2, the result is 5 * 0.2 = 1 day. That means, 1 day backwards and / or 1 day onwards will be added to the original calculated time range. The event's area to be preloaded is wider then. This helps to avoid frequently, time-consuming fetching of events. Note: the preload factor in the diagram above was 0.

Let me show the code now. The code is taken from this live example of the deployed showcase.
<div id="loadingText" style="font-weight:bold; margin:-5px 0 5px 0; visibility:hidden;">Loading ...</div>  

<pe:timeline id="timeline" value="#{lazyTimelineController.model}"
preloadFactor="#{lazyTimelineController.preloadFactor}"
zoomMax="#{lazyTimelineController.zoomMax}"
minHeight="170" showNavigation="true">
<p:ajax event="lazyload" update="@none" listener="#{lazyTimelineController.onLazyLoad}"
onstart="$('#loadingText').css('visibility', 'visible')"
oncomplete="$('#loadingText').css('visibility', 'hidden')"/>
</pe:timeline>
You see a hidden "Loading ..." text and the timeline tag. The text is shown when a "lazyload" AJAX request is sent and gets hidden when the response is back. The bean class LazyTimelineController looks as follows
@ManagedBean
@ViewScoped
public class LazyTimelineController implements Serializable {

private TimelineModel model;

private float preloadFactor = 0;
private long zoomMax;

@PostConstruct
protected void initialize() {
// create empty model
model = new TimelineModel();

// about five months in milliseconds for zoomMax
// this can help to avoid a long loading of events when zooming out to wide time ranges
zoomMax = 1000L * 60 * 60 * 24 * 31 * 5;
}

public TimelineModel getModel() {
return model;
}

public void onLazyLoad(TimelineLazyLoadEvent e) {
try {
// simulate time-consuming loading before adding new events
Thread.sleep((long) (1000 * Math.random() + 100));
} catch (Exception ex) {
// ignore
}

TimelineUpdater timelineUpdater = TimelineUpdater.getCurrentInstance(":mainForm:timeline");

Date startDate = e.getStartDateFirst(); // alias getStartDate() can be used too
Date endDate = e.getEndDateFirst(); // alias getEndDate() can be used too

// fetch events for the first time range
generateRandomEvents(startDate, endDate, timelineUpdater);

if (e.hasTwoRanges()) {
// zooming out ==> fetch events for the second time range
generateRandomEvents(e.getStartDateSecond(), e.getEndDateSecond(), timelineUpdater);
}
}

private void generateRandomEvents(Date startDate, Date endDate, TimelineUpdater timelineUpdater) {
Calendar cal = Calendar.getInstance();
Date curDate = startDate;
Random rnd = new Random();

while (curDate.before(endDate)) {
// create events in the given time range
if (rnd.nextBoolean()) {
// event with only one date
model.add(new TimelineEvent("Event " + RandomStringUtils.randomNumeric(5), curDate), timelineUpdater);
} else {
// event with start and end dates
cal.setTimeInMillis(curDate.getTime());
cal.add(Calendar.HOUR, 18);
model.add(new TimelineEvent("Event " + RandomStringUtils.randomNumeric(5), curDate, cal.getTime()),
timelineUpdater);
}

cal.setTimeInMillis(curDate.getTime());
cal.add(Calendar.HOUR, 24);

curDate = cal.getTime();
}
}

public void clearTimeline() {
// clear Timeline, so that it can be loaded again with a new preload factor
model.clear();
}

public void setPreloadFactor(float preloadFactor) {
this.preloadFactor = preloadFactor;
}

public float getPreloadFactor() {
return preloadFactor;
}

public long getZoomMax() {
return zoomMax;
}
}
The listener onLazyLoad gets an event object TimelineLazyLoadEvent. The TimelineLazyLoadEvent contains one or two time ranges the events should be loaded for. Two times ranges occur when you zoom out the timeline (as in the screenshot at the end of this post). If you know these time ranges (start / end time), you can fetch events from the database or whatever. Server-side added events can be automatically updated in the UI. This happens as usally by TimelineUpdater: model.add(new TimelineEvent(...), timelineUpdater).

I hope the code is self-explained :-).


PrimeFaces Extensions 1.0.0 released

PrimeFaces Extensions: drag-and-drop feature in Timeline

$
0
0
Since the last release of the PrimeFaces Extensions, the Timeline component allows dragging items from the outside (an external list, etc.) and dropping them onto the Timeline. The picture shows the dragging / dropping process.


When an item is dragged and dropped, an event with an end date will be created. The end date is the start date + 10% of the timeline width. This default algorithm fits the most use cases. Tip: if events are editable, you can adjust the start / end date later by double clicking on an event.

To activate the built-in drag-and-drop feature, simple add p:ajax with event="drop" to the timeline tag.
<div style="float:left;">
<strong>Drag and drop events</strong>
<p/>
<p:dataList id="eventsList" value="#{dndTimelineController.events}"
var="event" itemType="circle">
<h:panelGroup id="eventBox" layout="box" style="z-index:9999; cursor:move;">
#{event.name}
</h:panelGroup>

<p:draggable for="eventBox" revert="true" helper="clone" cursor="move"/>
</p:dataList>
</div>

<pe:timeline id="timeline" value="#{dndTimelineController.model}" var="event"
editable="true" eventMargin="10" eventMarginAxis="0" minHeight="250"
start="#{dndTimelineController.start}" end="#{dndTimelineController.end}"
timeZone="#{dndTimelineController.localTimeZone}"
style="margin-left:135px;" snapEvents="false" showNavigation="true"
dropActiveStyleClass="ui-state-highlight" dropHoverStyleClass="ui-state-hover">
<p:ajax event="drop" listener="#{dndTimelineController.onDrop}" global="false" update="eventsList"/>

<h:outputText value="#{event.name}"/>
... other properties can be displayed too
</pe:timeline>
In this example, the objects in the list (on the left side) have properties name, start date, end date.
public class Event implements Serializable {

private String name;
private Date start;
private Date end;

// constructors, getter / setter
...

@Override
public boolean equals(Object o) {
if (this == o) {
return true;
}

if (o == null || getClass() != o.getClass()) {
return false;
}

Event event = (Event) o;

if (name != null ? !name.equals(event.name) : event.name != null) {
return false;
}

return true;
}

@Override
public int hashCode() {
return name != null ? name.hashCode() : 0;
}
}
The bean class defines the AJAX listener onDrop. The listener gets an instance of the class TimelineDragDropEvent. Besides start / end date and group, this event object also contains a client ID of the dragged component and dragged model object if draggable item is within a data iteration component.
public class DndTimelineController implements Serializable {

private TimelineModel model;
private TimeZone localTimeZone = TimeZone.getTimeZone("Europe/Berlin");
private List<Event> events = new ArrayList<Event>();

@PostConstruct
protected void initialize() {
// create timeline model
model = new TimelineModel();

// create available events for drag-&-drop
for (int i = 1; i <= 13; i++) {
events.add(new Event("Event " + i));
}
}

public void onDrop(TimelineDragDropEvent e) {
// get dragged model object (event class) if draggable item is within a data iteration component,
// update event's start / end dates.
Event dndEvent = (Event) e.getData();
dndEvent.setStart(e.getStartDate());
dndEvent.setEnd(e.getEndDate());

// create a timeline event (not editable)
TimelineEvent event = new TimelineEvent(dndEvent, e.getStartDate(), e.getEndDate(), false, e.getGroup());

// add a new event
TimelineUpdater timelineUpdater = TimelineUpdater.getCurrentInstance(":mainForm:timeline");
model.add(event, timelineUpdater);

// remove from the list of all events
events.remove(dndEvent);

FacesMessage msg = new FacesMessage(FacesMessage.SEVERITY_INFO,
"The " + dndEvent.getName() + " was added", null);
FacesContext.getCurrentInstance().addMessage(null, msg);
}

public TimelineModel getModel() {
return model;
}

public TimeZone getLocalTimeZone() {
return localTimeZone;
}

public List<Event> getEvents() {
return events;
}

public Date getStart() {
return start;
}

public Date getEnd() {
return end;
}
}
Please also consider the drag-and-drop related attributes dropHoverStyleClass, dropActiveStyleClass, dropAccept, dropScope. They are similar to corresponding attributes in p:droppable. There is only one difference - the datasource attribute is not needed. p:droppable in PrimeFaces has this attribute which represents an ID of an UIData component to connect with. I have never understood why we need this. It is possible to get the UIData component with a simple trick. The reading below is for advanced developers.

The drop callback from the jQuery Droppable gets an ui object with a reference to the draggable element. So we can look for a closest DOM element which is a container for an UIData component.
var params = [];

// Check if draggable is within a data iteration component.
// Note for PrimeFaces team: an additional unified style class ".ui-data" for all UIData components would be welcome here!
var uiData = ui.draggable.closest(".ui-datatable, .ui-datagrid, .ui-datalist, .ui-carousel");
if (uiData.length > 0) {
params.push({
name: this.id + '_uiDataId',
value: uiData.attr('id')
});
}

params.push({
name: this.id + '_dragId',
value: ui.draggable.attr('id')
});

// call the drop listener
this.getBehavior("drop").call(this, evt, {params: params, ...});
In the component itself, the current dragged object is extracted by this snippet
FacesContext context = FacesContext.getCurrentInstance();
Map<String, String> params = context.getExternalContext().getRequestParameterMap();
String clientId = this.getClientId(context);

Object data = null;
String dragId = params.get(clientId + "_dragId");
String uiDataId = params.get(clientId + "_uiDataId");

if (dragId != null && uiDataId != null) {
// draggable is within a data iteration component
UIDataContextCallback contextCallback = new UIDataContextCallback(dragId);
context.getViewRoot().invokeOnComponent(context, uiDataId, contextCallback);
data = contextCallback.getData();
}

TimelineDragDropEvent te = new TimelineDragDropEvent(this, behaviorEvent.getBehavior(), ... dragId, data);
The JSF standard method invokeOnComponent does the job. Now the data object is available in TimelineDragDropEvent. The class UIDataContextCallback is a simple implementation of the JSF ContextCallback interface.
public class UIDataContextCallback implements ContextCallback {

private String dragId;
private Object data;

public UIDataContextCallback(String dragId) {
this.dragId = dragId;
}

public void invokeContextCallback(FacesContext fc, UIComponent component) {
UIData uiData = (UIData) component;
String[] idTokens = dragId.split(String.valueOf(UINamingContainer.getSeparatorChar(fc)));
int rowIndex = Integer.parseInt(idTokens[idTokens.length - 2]);
uiData.setRowIndex(rowIndex);
data = uiData.getRowData();
uiData.setRowIndex(-1);
}

public Object getData() {
return data;
}
}

Pass JavaScript function via JSON. Pitfall and solution.

$
0
0
JSON is a lightweight data-interchange format. It is well readable and writable for humans and it is easy for machines to parse and generate. The most of JavaScript libraries, frameworks, plugins and whatever are configurable by options in JSON format. Sometimes you have to parse a JSON string (text) to get a real JavaScript object. For instance, sometimes you have to read the whole JSON structure from a file and make it available on the client-side as an JavaScript object. The JSON text should be well-formed. Passing a malformed JSON text results in a JavaScript exception being thrown.

What does "well-formed" mean? A well-formed JSON structure consists of data types string, number, object, array, boolean or null. Other data types are not allowed. An example:
{
"name": "Max",
"address": {
"street": "Big Avenue 5",
"zipcode": 12345,
"country": "USA"
},
"age": 35,
"married": true,
"children": ["Mike", "John"]
}
You see here string values for keys "name", "street" and "country", number values for "zipcode" and "age", boolean value for "married", object for "address" and array for "children". But what is about JavaScript functions? Some scripts allow to pass functions as values. For instance as in some chart libraries:
{
"margin": "2px",
"colors": ["#FFFFFF", "CCCCCC"],
"labelFormatter": function(value, axis) {return value + ' degree';}
}
If you try to parse this JSON text, you will face an error because function(value, axis) {return value + ' degree';} is not allowed here. Try to put this structure into this online JSON viewer to see that JSON format doesn't accept functions. So, the idea is to pass the function as string:
{
"borderWidth": "2px",
"colors": ["#FFFFFF", "CCCCCC"],
"labelFormatter": "function(value, axis) {return value + ' degree';}"
}
This syntax can be parsed. But we have another problem now. We have to make a real JavaScript function from its string representation. After trying a lot I found an easy solution. Normally, to parse a well-formed JSON string and return the resulting JavaScript object, you can use a native JSON.parse(...) method (implemented in JavaScript 1.7), JSON.parse(...) from json2.js written by Douglas Crockford or the jQuery's $.parseJSON(...). The jQuery's method only expects one parameter, the JSON text: $.parseJSON(jsonText). So, you can not modify any values with it. The first two mentioned methods have two parameters
 
JSON.parse(text, reviver)
 
The second parameter is optional, but exactly this parameter will help us! reviver is a function, prescribes how the value originally produced by parsing is transformed, before being returned. More precise: the reviver function can filter and transform the results. It receives each of the keys and values, and its return value is used instead of the original value. If it returns what it received, then the structure is not modified. If it returns undefined then the member is deleted. An example:
var transformed = JSON.parse('{"p": 5}', function(k, v) {if (k === "") return v; return v * 2;});

// The object transformed is {p: 10}
In our case, the trick is to use eval in the reviver to replace the string value by the corresponding function object:
var jsonText = ".....";  // got from any source

var jsonTransformed = JSON.parse(jsonText, function (key, value) {
if (value && (typeof value === 'string') && value.indexOf("function") === 0) {
// we can only pass a function as string in JSON ==> doing a real function
eval("var jsFunc = " + value);
return jsFunc;
}

return value;
});
I know, eval is evil, but it doesn't hurt here. Well, who doesn't like eval there is another solution without it.
var jsonTransformed = JSON.parse(jsonText, function (key, value) {
if (value && (typeof value === 'string') && value.indexOf("function") === 0) {
// we can only pass a function as string in JSON ==> doing a real function
var jsFunc = new Function('return ' + value)();
return jsFunc;
}

return value;
});
Viewing all 79 articles
Browse latest View live